PRO Digital Overlay
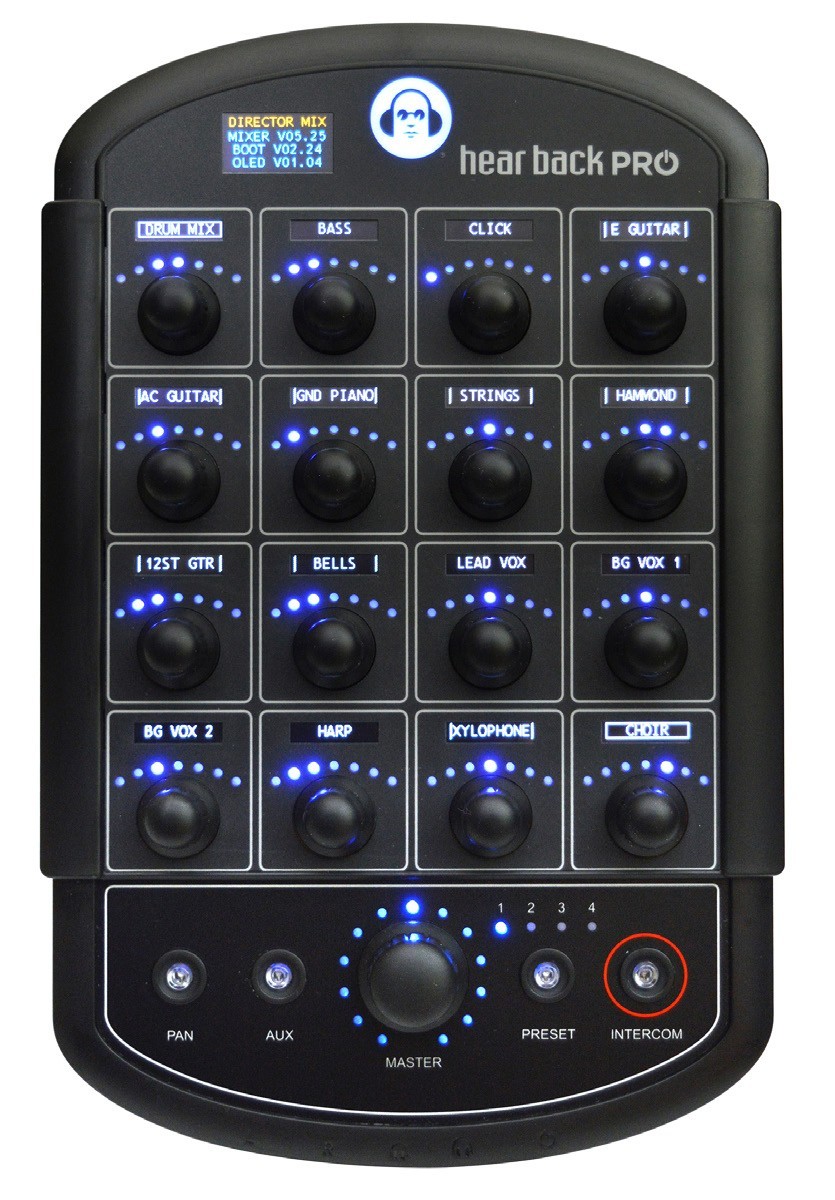
The PRO Digital Overlay is an ultra-thin faceplate for electronic labeling of a Hear Back PRO Mixer. This attachable upgrade modifies and expands the display of channels and mixer functions through high contrast OLED graphical displays. The Digital Overlay permanently mounts directly onto the PRO Mixer's face and connects via a ribbon cable into the Mixer's side expansion slot. The naming functions can be accessed and updated through the PRO Connect software. The PRO Digital Overlay is a time saving and easy to read solution to the standard scribble strip for engineers and end users in studio sessions and live entertainment settings.
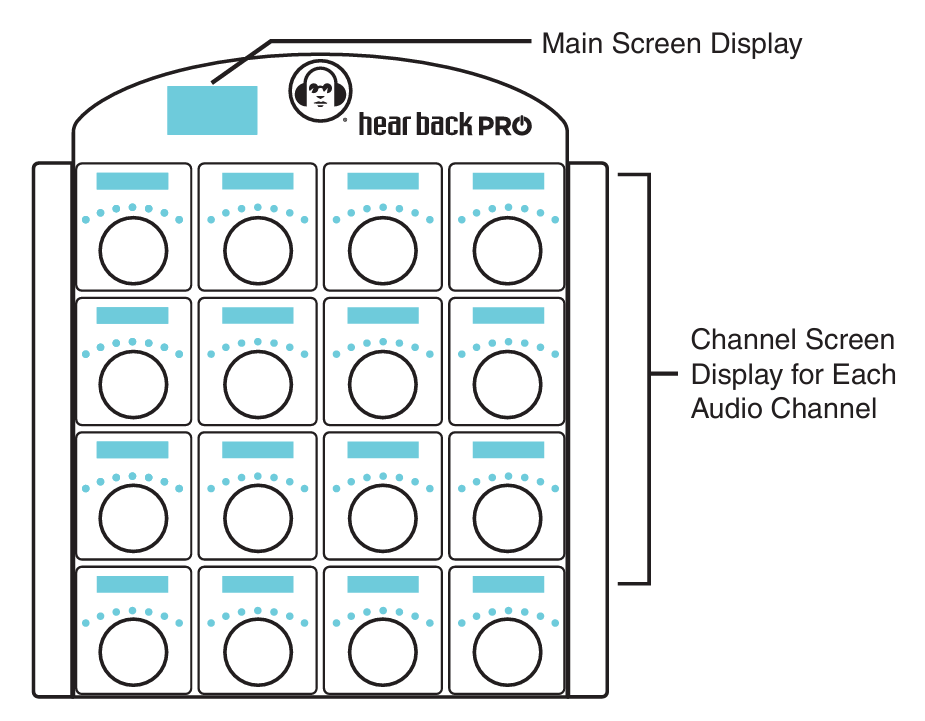
Overlay Detail Diagram
Advantages / Features
- Unobtrusive with a thin, ultra-low profile (less than 3mm thickness)
- Rugged design for stage and touring
- Easy and quick installation
- Supports the use of letters, numbers, and symbols when labeling channels and Mixers
- Bright and easily legible OLED screens allow for quick identification and control, even in low or high light environments
- Mixers and channels can be named and updated remotely via the PRO Connect software
Miniumum PRO Mixer firware version is V6 for installation. Software Updates are available through PRO Connect.
Turning off the PRO system when not in use may prolong OLED screen life!
Burn-in is possible on any display technology.
Installation
Though the PRO Digital Overlay is rugged once installed onto the Mixer, DO NOT BEND OR TWIST THE OVERLAY, prior to or during the installation process.
Take care when handling the ribbon cable during the installation process. Creasing or twisting the cable can affect performance of the Overlay.
Once mounted, the PRO Digital Overlay cannot be removed. Take adequate care when aligning and applying to the PRO Mixer front.
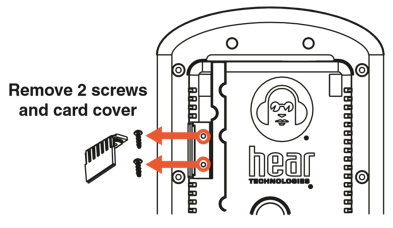
- Remove the two screws attaching the expansion card slot cover to the Mixer. Keep screws for reuse.
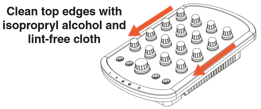
- Clean Mixer top edges with isopropyl alcohol and a lint-free cloth (do not saturate).
-
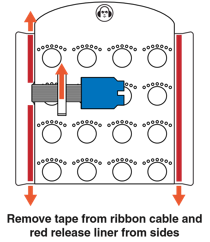
With the Overlay face-down, CAREFULLY remove the tape securing the flexible ribbon cable to the bottom of the Overlay. Gently pull the tabbed end of the tape while applying pressure to the opposite end.
-
On the left and right sides of the Overlay, peel the red release liner off the double-sided mounting tape.
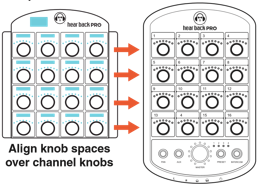
- Align Digital Overlay above PRO Mixer so the knob spaces are centered over the corresponding knobs.
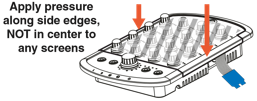
- Press Digital Overlay firmly onto Mixer faceplate along the side edges. DO NOT apply pressure to any screens.
- Gently curving the flexible ribbon cable, turn the blue connector card towards the expansion slot and align with top rails. (DO NOT TWIST OR CREASE the ribbon cable).
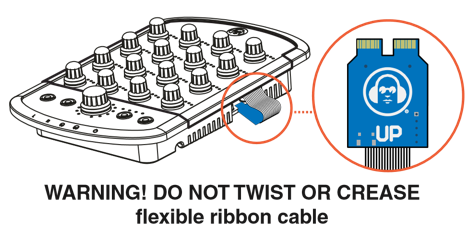
- Slide connector card face "UP" firmly into the top rails of the expansion slot until it clicks.
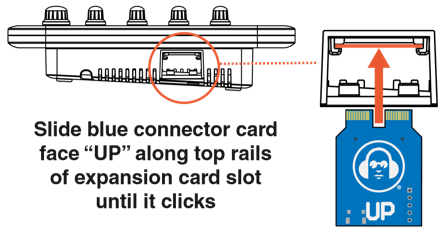
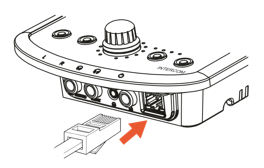
- Apply power to the Mixer by inserting the network cable into the Ethernet port.
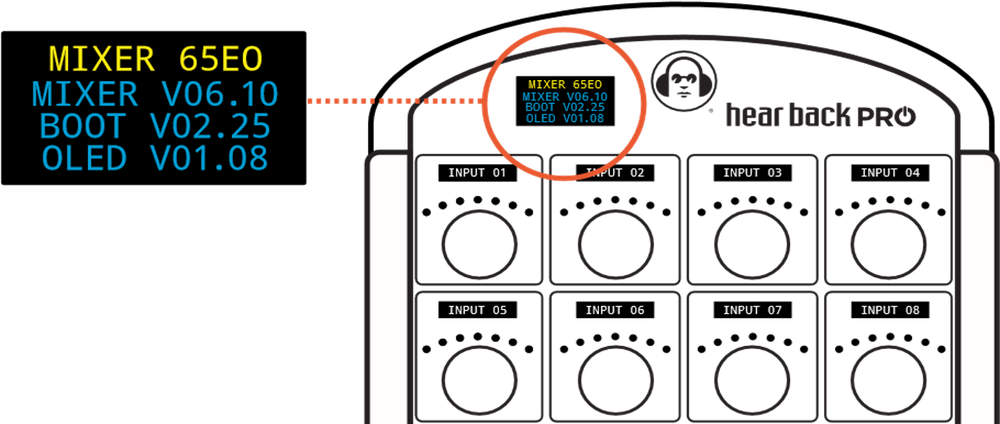
- Following the bootup sequence, the main screen at the top left of the Digital Overlay will display the Mixer's firmware, bootloader, and overlay version.
- Each screen above the 16 knobs will illuminate and display either the default channel numbers (INPUT 01, INPUT 02, etc.), or the channel names stored in the V6 Firmware or later PRO Hub.

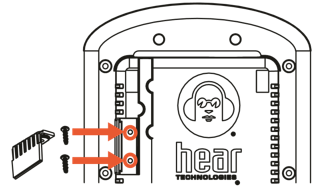
- Attach the new expansion card slot cover, supplied with the PRO Digital Overlay, using the original screws that were removed during installation.
Supported Characters
The following characters are supported on all OLED screens:

Channel Naming
Channel names can be created and updated instantaneously via the PRO Connect software. The names are stored in the Hub's internal memory and shared by all PRO Mixers. Channel names will be displayed on the channel screen displays.
New interface. New level of control.
PRO Connect provides a web-based interface to update, configure, and control your Hear Back PRO and Switch Back PLUS systems.
 [Download for Windows]
 [Download for macOS]
- Select the Channels Tab in PRO Connect.
- Click inside the channel you intend to edit.
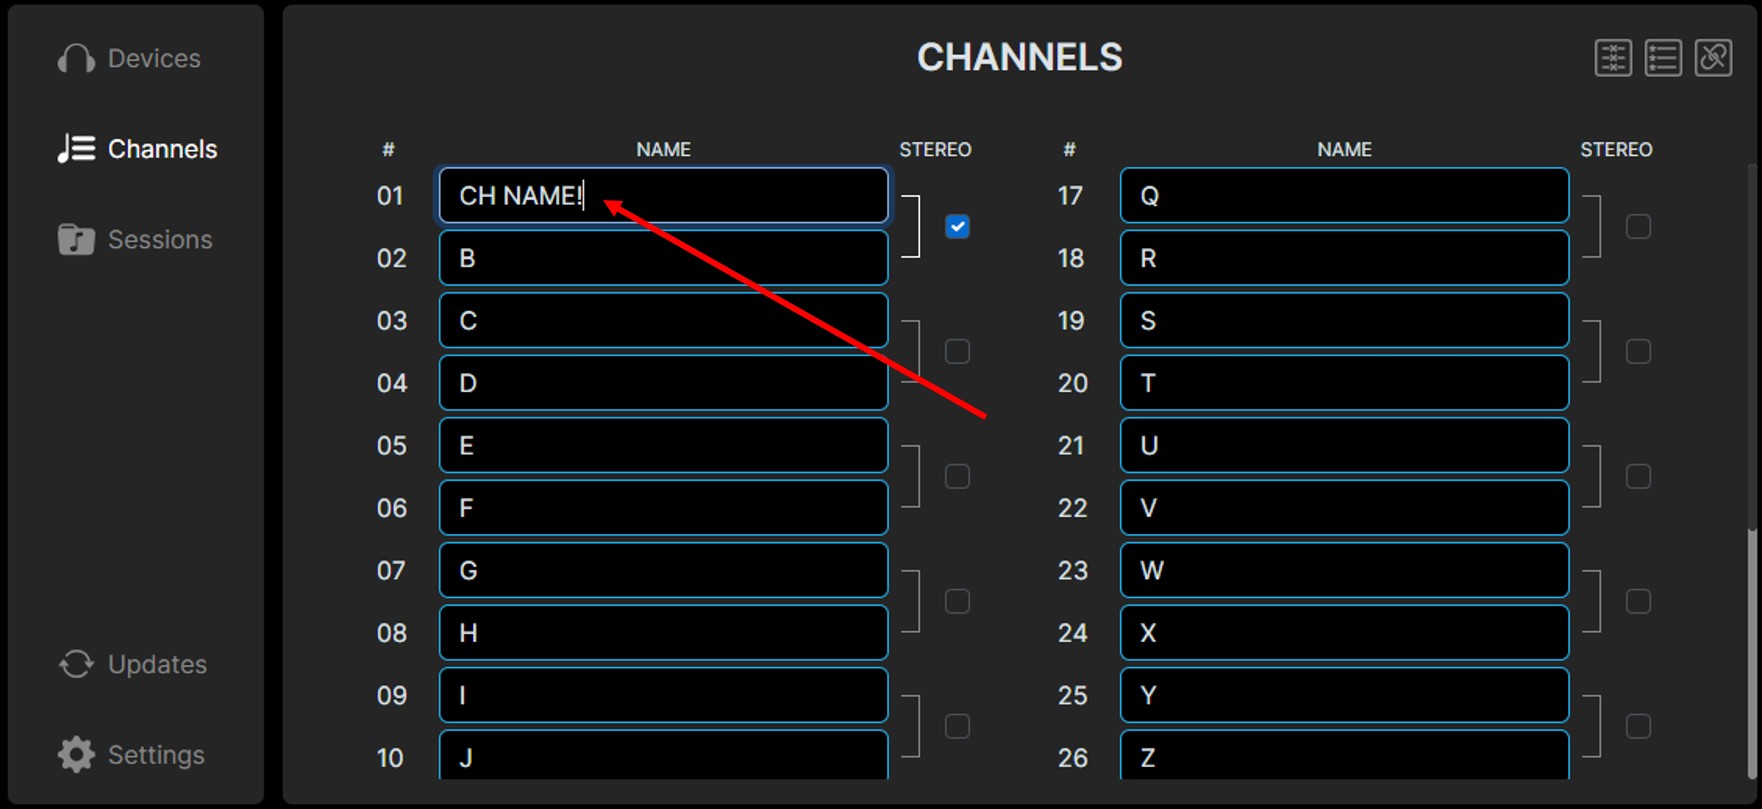
- Change the channel name and then press ENTER.
Mixer Naming
PRO Mixers can be named for easier identification via the PRO Connect software. Mixer names are saved only on the Mixer, not on the Hub.
- Select the Devices Tab in PRO Connect.
- Select your Mixer in the devices list.
- Click the pencil icon next to the Mixer name.
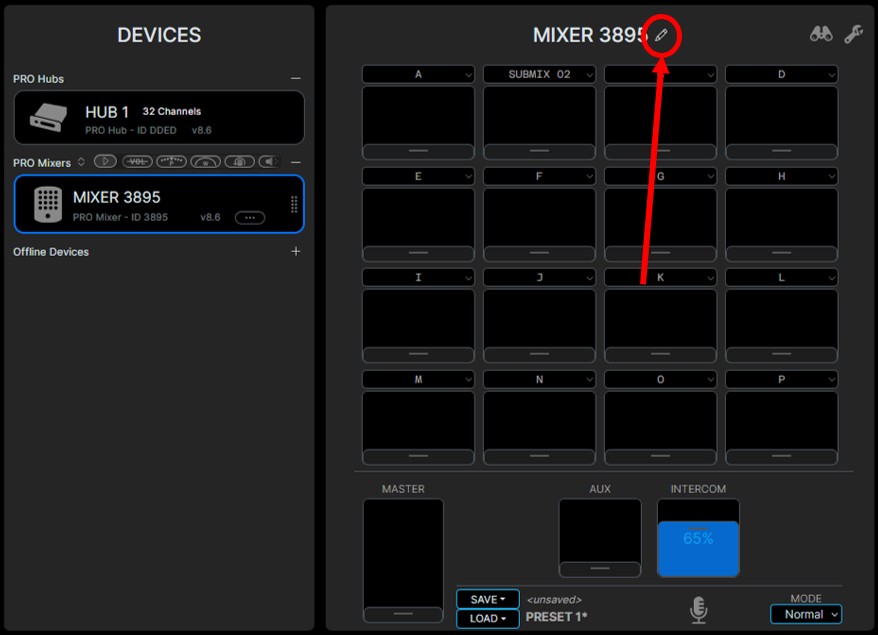
- Edit the Mixer name and save ✓.
Channel Screen Display
Each screen above the 16 knobs displays either the default channel numbers (INPUT 01, INPUT 02, etc.), or the channel names stored in the V6 or later PRO Hub.
Stereo Links
When two adjacent channels are stereo linked, the vertical bar icon "|" will appear on both sides of the channel name (e.g. INPUT 01 and INPUT 02). These paired channels can be named independently while being controlled simultaneously.

Submixes
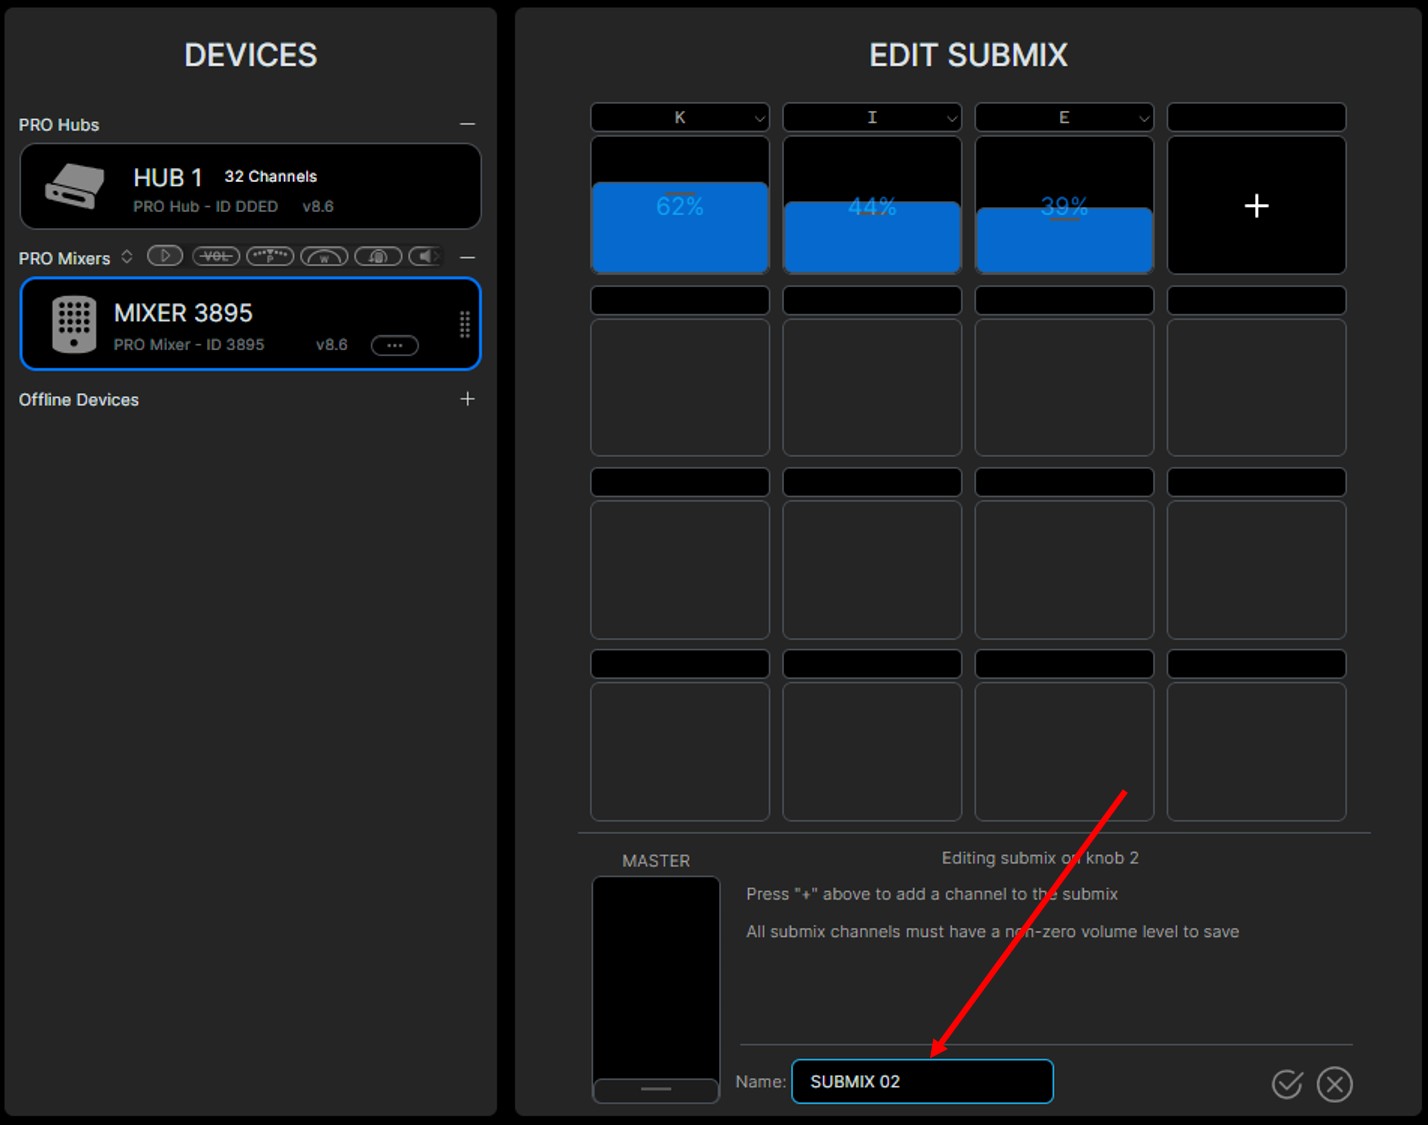
Submixes are identified by a rectangular box around the name in the channel screen above any of the Mixer's 16 channel knobs (e.g. SUBMIX 01). Submix names and content can be edited via the PRO Connect software.

Naming a Submix via the PRO Connect Software
- Select the Devices Tab in PRO Connect.
- Choose the Mixer you want to edit a submix on.
- Drop down the channel name display, click the SUBMIX tab, and then click EDIT.
- Edit the name in the bottom panel and save ✓ the submix.
Main Screen Display
The main screen at the top left of the Digital Overlay displays the Mixer's name and status including firmware version, channel levels, mode status, preset function, and text messages.
Firmware Display
Each time a Mixer equipped with the PRO Digital Overlay completes its power up cycle, the main screen will display the current Mixer firmware and boot version, as well as the current Mixer overlay version.
Channel Knob Adjustments
In addition to the seven LED indicators above each channel knob, levels are tracked and the exact value is displayed by the main screen. The main screen will display "Volume Mode", "Pan Mode", and "Stereo Width Mode" statuses. After adjusting, the main screen will continue to display the channel name and current set value for approximately 4 seconds or until another channel is adjusted.
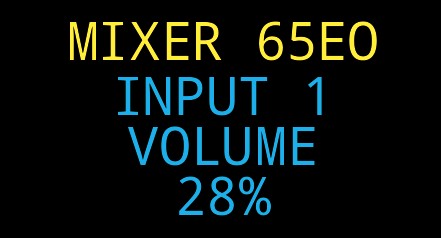
Volume Mode
When making adjustments to one of the 16 channel knobs, the respective channel name will appear in the main screen as well as its current adjusted value as a percentage from 0-100%.
Pan Mode
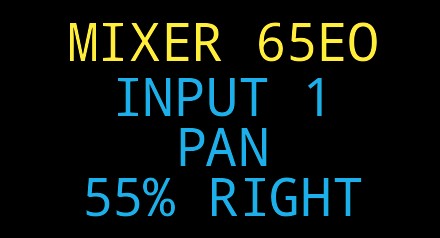
When making adjustments while in "Pan Mode" mode, the respective channel name will appear in the main screen, with the pan value in percentage, as well as, the pan direction as "% Left", "Center", or "% Right".
Stereo Width Mode
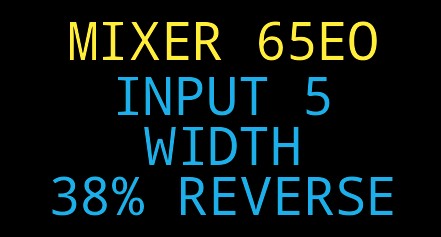
When stereo-linked channels are present, current stereo width settings are displayed as "% Wide", "Mono", and "% Reverse".
Presets
The following preset functions are displayed in the main screen:
PRESET # LOADED
Displays which preset is selected
PRESET # SAVED
Displays when a current preset is being stored or overwritten
PRESET ERASED
If a preset is zeroed out by holding the PAN and AUX buttons simultaneously
Grouped Mixers
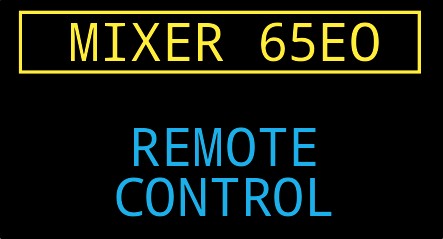
When Mixers are linked together, the first Mixer in the group defaults as the master Mixer, and each concurrent Mixer in the group becomes a slave Mixer. Each slave Mixer in a group will display "REMOTE CONTROL" in the main screen to signify it is functioning in a group.
Text Messages
The PRO Digital Overlay also displays text messages in the main screen. This allows the engineer to communicate with players without using the intercom feature. After a message is sent, it will continue to flash on the main screen until the Mixer is adjusted (e.g. touch a knob, press a button). Text messages can be sent from the PRO Connect app to all the Mixers in a session or to specific individual Mixers equipped with a PRO Digital Overlay.
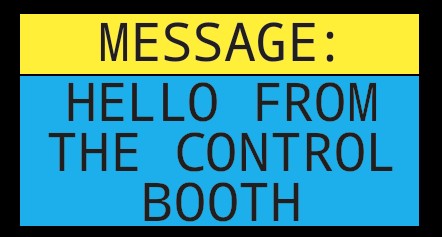
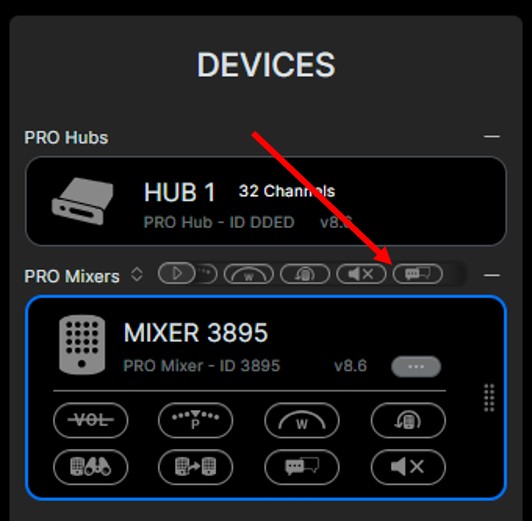
Send a Text Message to All Mixers
- Select the Devices tab in PRO Connect.
- Click the message icon next to the PRO Mixers section label.
- Enter your message and click SEND.
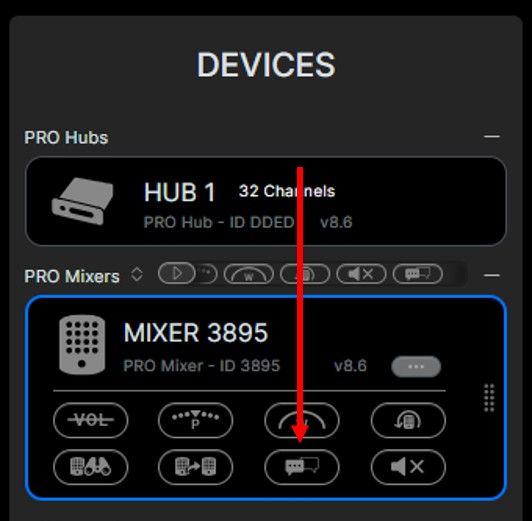
Send a Text Message to a Specific Mixer
- Select the Devices tab in PRO Connect.
- Click the message icon in the individual Mixer in the PRO Connect app.
- Enter your message and click SEND.
Technical Specifications
Compatibility:
PRO Mixer Minimum Firmware:
V6.1 with bootloader 2.24 or later
PRO Hub Minimum Firmware:
V6.1 with bootloader 2.25 or later
Screen Dimensions:
Main Screen: 128 x 64 pixels
Channel Screen: 96 x 16 pixels
Screen Character Limit:
Main Screen: 4 lines of 12 characters each
Channel Screen: 1 line of 9 characters
Size:
15.72 cm W x 17.15 cm H x .27 mm D
Unit Weight:
0.14 lbs
Mounting:
3M very high bond (VHB) double-sided tape
Power::
Supplied by PRO Mixer through connected ribbon cable into expansion card slot
Troubleshooting
Mixer power is on, but Overlay's OLED screens don't light up
- Remove the blue connector card at the end of the flexible ribbon cable and reinsert into the Mixer's side expansion slot firmly until it clicks.
- Ensure the connector is aligned straight inside the rails during installation.
- If the connector has been installed at an angle, the Digital Overlay will not function properly.
- By default if connected properly, the main screen located to the left of the logo should display "PRO Overlay".
Channel screens do not display names
- Overlay should display default channel names above knobs (INPUT 01, INPUT 02, etc.).
- If this is not the case, it's possible one or more devices do not have the latest firmware updates.
- Minimum versions required: Hub Firmware 6.1 with Bootloader 2.5; Mixer Firmware 6.1 with Bootloader 2.24.
Cannot name channels with PRO Connect
- Ensure the firmware on the Hub and Mixer have the latest update.
- Minimum versions required: Hub Firmware 6.1 with Bootloader 2.5; Mixer Firmware 6.1 with Bootloader 2.24.
- Update the PRO Connect software to the latest version.
Firmware Updates
Firmware updates are available through the PRO Connect Software.
New interface. New level of control.
PRO Connect provides a web-based interface to update, configure, and control your Hear Back PRO and Switch Back PLUS systems.
- Select the Updates tab in PRO Connect.
- Select Hear Back PRO Mixers.
- Click the Digital Overlay icon in the top right corner of your screen.
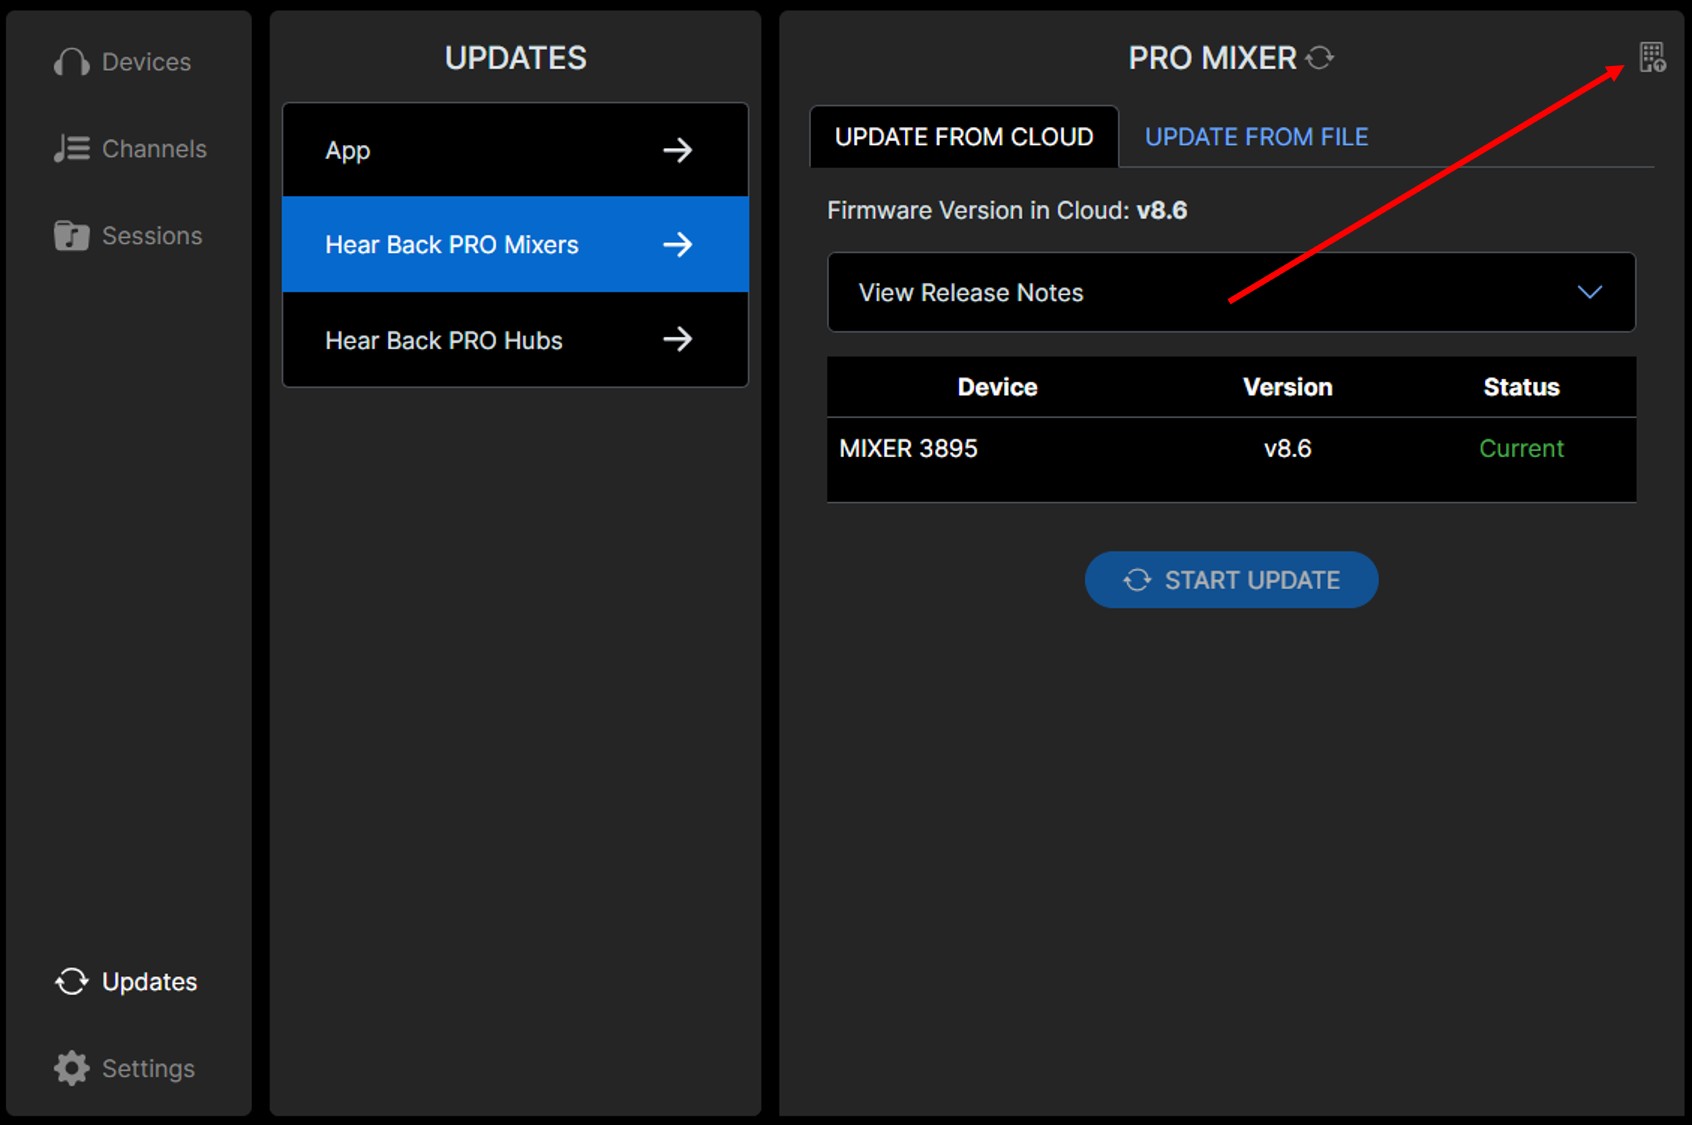
- Follow the on-screen instructions to perform the update.