Getting Started
Getting Started with PRO Connect
If you are having problems communicating with your PRO Hub from the PRO Connect Application please follow this guide to get started with your system.
The PRO Connect application does not currently support the WSG Bridge.
STEP 1: Install PRO Connect
The PRO Connect Application can be obtained here:
- 64 bit Mac Version: https://storage.googleapis.com/ht_firmware/pro_connect_app/pro-connect.dmg
- 64 bit Windows Version: https://storage.googleapis.com/ht_firmware/pro_connect_app/pro-connect-setup.exe
STEP 2: Connect HBUS IN
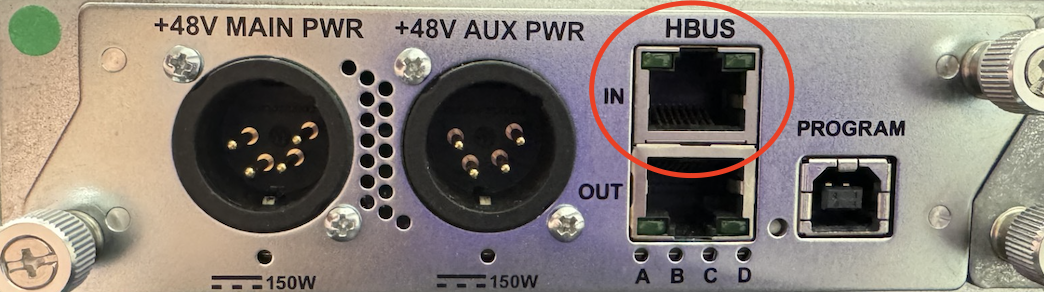
Wire your PRO Hub's HBUS IN port (this is the top ethernet port on your Hub's leftmost main card) directly to your computer's Ethernet port.
You can connect your Hub's HBUS IN Port to your computer through a network switch or router, but the Hub must be connected to a Gigabit port. Some managed switches can block the Hub's UDP packets. If you suspect this situation please try connecting the Hub directly to your PC first.
Use of Wi-Fi between the PRO Hub and the PRO Connect application is strongly discouraged. Many Wi-Fi networks will drop broadcast UDP packets and will cause unexpected and inconsistent communication with your devices.
STEP 3: Select the PRO Mode
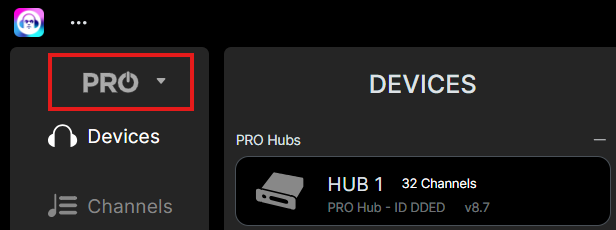
Ensure you are in PRO Connect's PRO mode of operation (not Dante mode). Use the dropdown here:
STEP 4: Select Devices Interface
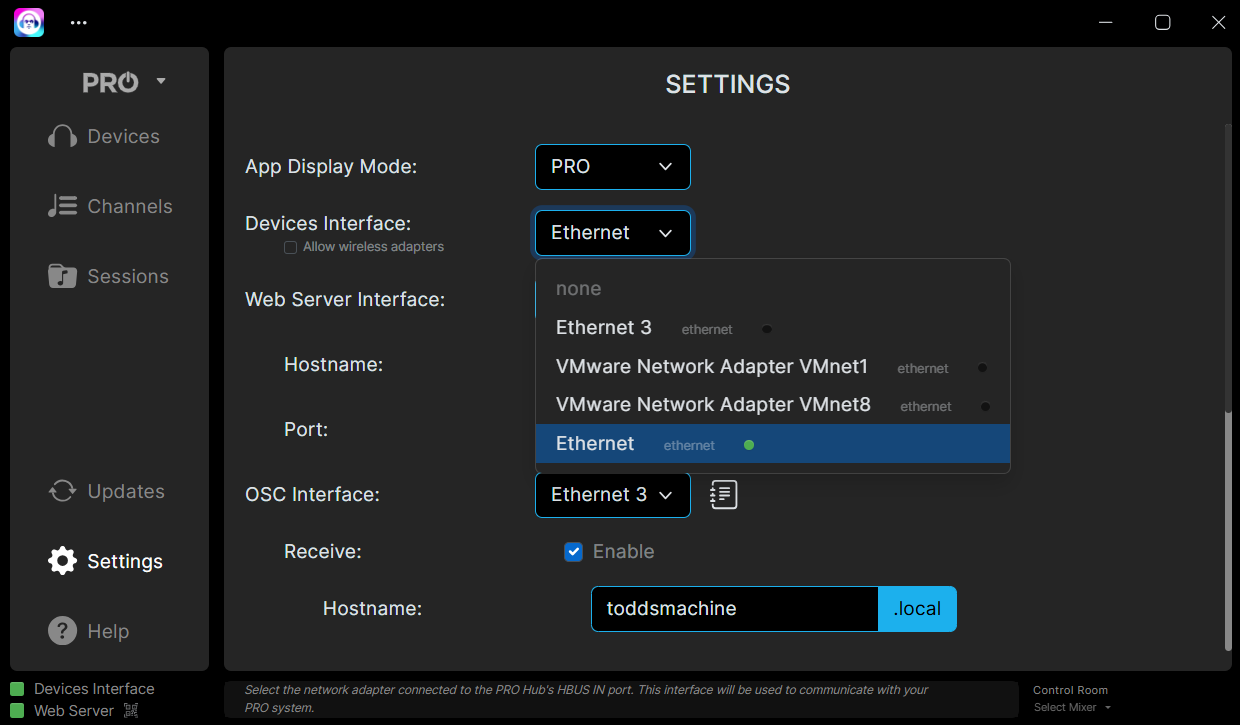
Select the correct ethernet port in the PRO Connect application for your Devices Interface in the app's Settings page. This should be the Ethernet interface that your PRO Hub is connected to.
STEP 5: Cycle Ethernet Cable
Disconnect the Ethernet cable from your computer and then reconnect it. This will allow your computer to properly identify with Hubs on the new Devices Interface.
STEP 6: Wait for Devices
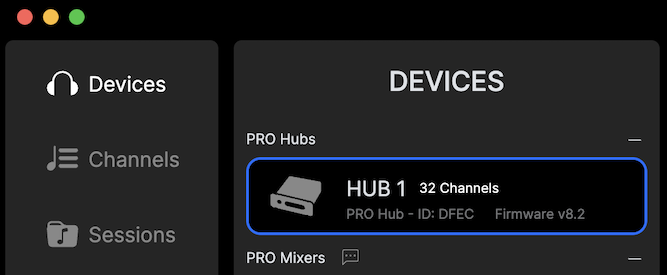
Wait until your Hub is displayed in the PRO Connect device list.
STEP 7: Update PRO Mixers
Update all PRO Mixers as required for compatibility with PRO Connect.
- PRO Mixers with a bootloader v2.24 and later can be updated over the network using the Updates tab in the PRO Connect application.
- Your PRO Mixer firmware will automatically be checked against the latest version in the cloud.
- Plan at least 15 minutes to complete this update.
- Follow all in-app instructions.
PRO Mixers with a bootloader version < v2.24 will require an update card. PRO Connect will direct you to the PRO Mixer Bootloader Update guide below.
STEP 8: Update PRO Hub
Update your PRO Hub as required for compatibility with PRO Connect.
- The Hub can be updated using the Hear Back PRO Hubs update utility in PRO Connect on the Updates tab.
- Your PRO Hub firmware will automatically be checked against the latest version in the cloud.
- Plan at least 15 minutes to complete this update.
- Follow all in-app instructions.
If you have a very old PRO Hub system, and this is your first time using PRO Connect, you may need to update the Hub's bootloader. This is a one-time update to make the Hub compatible with the network update feature. This should only be done if PRO Connect directs you to a bootloader update.
PRO Hub Bootloader Update
ONLY continue if you have first attempted to use PRO Connect's PRO Hub update utility. PRO Connect will automatically walk you through the update process.
PRO Hub bootloader Version
DO NOT attempt to update your Hub's bootloader unless directed to by PRO Connect.
- If your Hub's bootloader is v2.24 you should only be directed here if there is an error during the FPGA update process.
Troubleshooting
- Multiple users have experienced errors during the PRO Hub's FPGA update process.
- The FPGA update process requires treating the Hub's internal memory as USB Mass Storage device. Some computers do not react well to this.
Here are a few useful troubleshooting tips:
- Attempt to restart your computer and the PRO Hub before following the guide. Make sure PRO Connect is the only application running.
- Attempt to use another USB cable for the update.
- Many users have had trouble performing the USB update from a Mac Studio. We recommend trying a Windows computer.
- Occasionally, Mac computers will write extra cache data to the SD Card inside the PRO Hub. This can cause corrpution. The corruption will generally be cleared if the update is attempted from a Windows computer.
- Some IT departments have blocked the full access to USB ports that PRO Connect requires. Attempt to update the Hub from a computer that is not controlled by your IT department prior to installing the Hub in your network.
- AS A LAST RESORT you can attempt to remove your Hub's main card and re-seat the SD Card. Make sure the power is removed from your Hub before attempting this. The main card is always the left-most card if you are looking at the back of your PRO Hub. The SD Card is located on the bottom side of the Hub's main card circuit board. This has helped a few users in the past.
PRO Mixer Bootloader Update
ONLY continue if you see this warning screen in PRO Connect's PRO Mixer update utility and your Mixer's bootloader version is less than the minimum. DO NOT proceed if the bootloader version is v2.24 or greater.
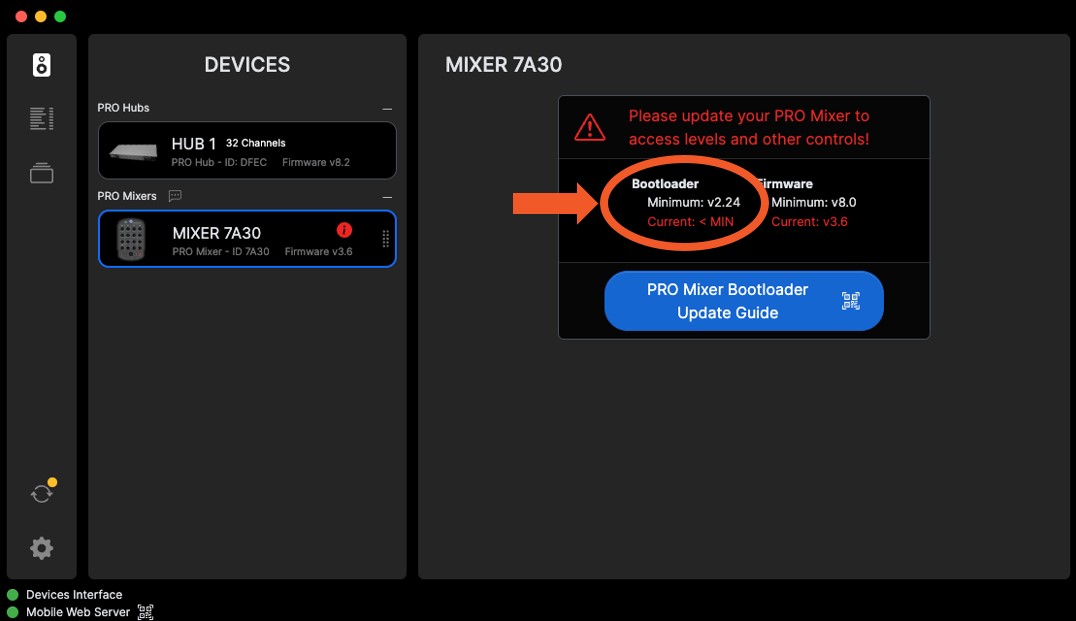
- A few early PRO Mixers were shipped with a bootloader that could not be updated over the network. There are very few of these remaining. Updating a Mixer with a bootloader < v2.24 requires using a physical update card that can only be obtained from Hear Technologies support.
STEP 1: Request Update Card
Obtain the mixer firmware update card.
- The initial Mixer bootloader update must be performed using a Firmware Update Card. Firmware Update Cards are available for purchase from Hear Technologies. Please Contact Tech Support to obtain an Update Card.
STEP 2: Follow Guide
Follow this: Firmware Update Guide to make your PRO Mixer's bootloader compatible with network updates.