Virtual Mixer Card
Overview
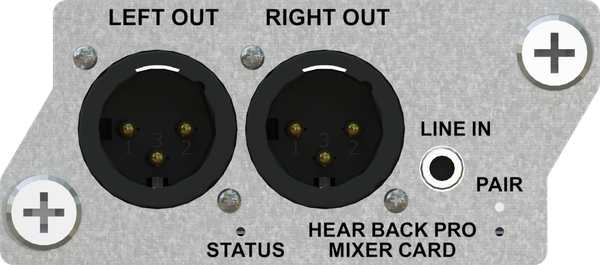
Virtual Mixer I/O Card for the HB PRO Hub boasts all the features of the HB PRO Mixer slimmed down into a card format. Control via the PRO Connect interface or from another PRO Mixer. Perfect for wireless in-ear monitor systems, you can mix up to 128 channels of high quality audio with 4 presets and intercom. Features an auxiliary 1/8" Stereo Unbalanced Audio Input and XLR Balanced Left and Right outputs. Also works great for receiving or sending intercom audio in a studio control room.
Advantages / Features
- Control from another PRO Mixer
- Features an auxiliary 1/8" Stereo Unbalanced Audio Input and XLR Balanced Left and Right outputs
- Also works great for receiving or sending intercom audio in a studio control room
Configuration
The following is applicable for V8 FW and later with PRO Connect.
The Virtual Mixer Card may be installed in any open slot on the PRO Hub. With power disconnected, install the Virtual Mixer Card carefully – some of the components on the bottom side of the board barely clear the chassis lip. Push to seat the gold fingers into the front card edge connector, then tighten the thumbscrews. Configure the card in PRO Connect.
Control
The Virtual Mixer Card can be controlled via PRO Connect or another physical PRO Mixer.
Option 1: Control via PRO Connect
- Install the Virtual Mixer Card in the desired Hub slot. Open PRO Connect and click the Hub icon, then click the "wrench" icon in the upper right-hand corner. From the drop-down menu of the corresponding Hub slot, select the Virtual Mixer Card.
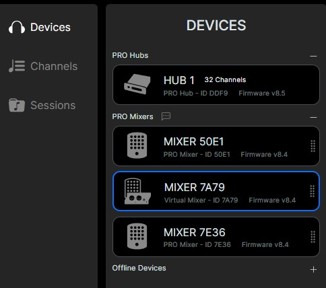
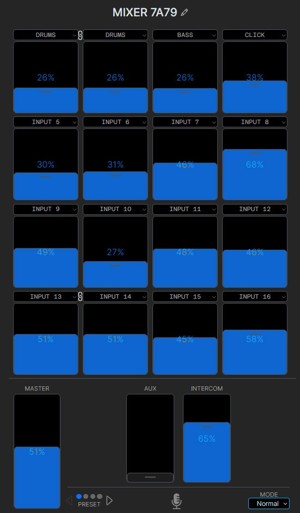
- Click the "Devices" icon in PRO Connect. The Virtual Mixer Card will appear in the list of "PRO Mixers" (screen A). Select the Virtual Mixer Card from the list to display the Mixer interface, giving you access to individual channel controls (screen B).
Option 2: Control via Another PRO Mixer
The Virtual Mixer Card can be controlled with another PRO Mixer by A) pairing via the PAIR button or B) pairing via PRO Connect.
A. Pairing via "PAIR" Button
- Apply power to Hub. The STATUS LED on the Virtual Mixer Card will illuminate RED, and then the PAIR LED will flash GREEN several times before stopping.
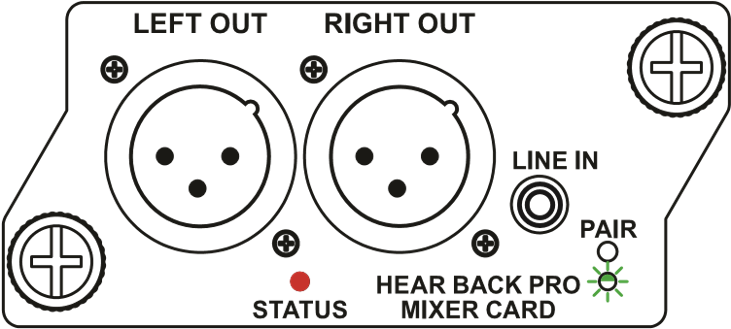
- Using a micro screwdriver, toothpick, or tweaker, press the recessed PAIR button above the GREEN LED. Hold it in until the LED flashes quickly, then release.
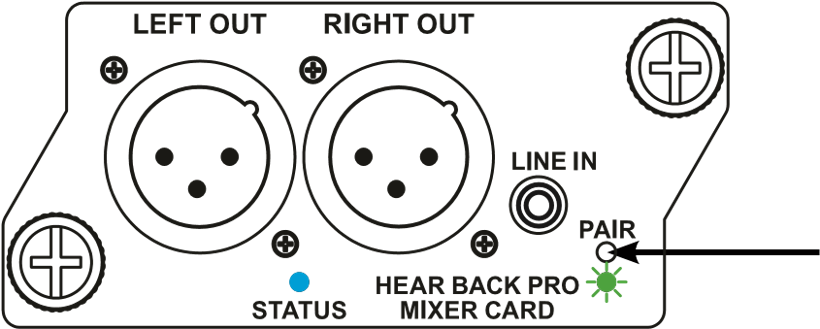
- After a few seconds, the LED will begin to flash slowly. It is now ready to be paired with a PRO mixer.
- Select the PRO Mixer you wish to pair with the Virtual Mixer Card. On that Mixer, press AUX and PRESET at the same time. You will see all the channels and Master LED rings flash simultaneously, letting you know it has paired with the Virtual Mixer Card. The pairing LED on the card will go solid GREEN.
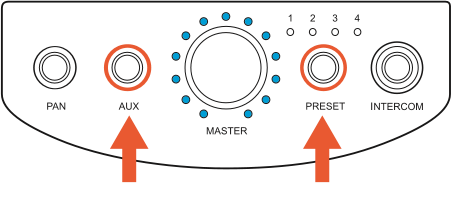
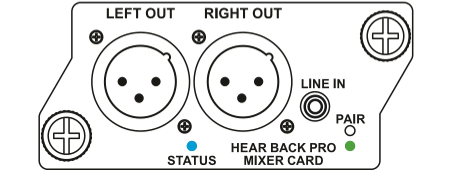
On the paired Mixer, press AUX and PRESET at the same time while turning the Master Volume knob in any direction. All LEDs around the Master knob will be unlit to indicate that the Mixer is no longer paired.
B. Pairing via PRO Connect
- To pair a PRO Mixer to your Virtual Mixer Card via PRO Connect, ensure both devices are listed in "Devices". From "DEVICES", select the Virtual Mixer Card then click the "wrench" icon in the top right corner. In "Group" settings, toggle the first setting "Mixer is Grouped" to "On". A "Group Number" box will appear; enter a specific group number for your Virtual Mixer Card and paired PRO Mixer (screen C).
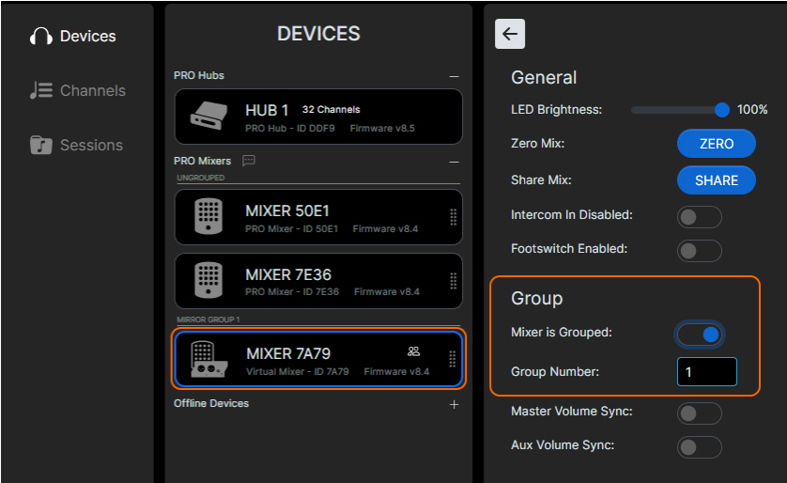
- Now, from the "DEVICES" list, select the Mixer you wish to pair and click the "wrench" icon in the top right corner. In "Group" settings, toggle the setting "Mixer is Grouped" to "On" and enter the same group number as the Virtual Mixer Card (screen D). Now controlling the PRO Mixer (either physically or via PRO Connect) will also control the mix on the Virtual Mixer Card.
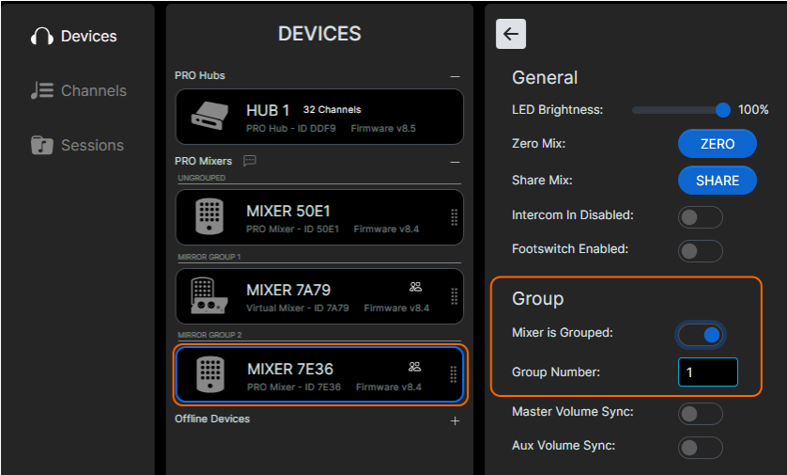
Toggle the "Mixer is grouped" setting to "off" in PRO Connect.
Receiving Intercom Audio in the Control Room
Intercom audio can be received in the control room A) via paired PRO Mixer or B) via PRO Connect.
First, connect the LEFT OUT (balanced), located on the Virtual Mixer Card, to an unused input on console.
Option 1: Intercom via PRO Connect
- From "DEVICES", select the Virtual Mixer Card, then turn all the channels volumes to zero.
- Trigger "Intercom" on a paired physical Mixer. Listen to the level and adjust the Master Volume to the desired level. The Virtual Mixer Card will retain the settings.
Option 2: Intercom via Paired PRO Mixer
- Pair the Virtual Mixer Card to a PRO Mixer. Once paired, ensure all channel volume levels are turned down.
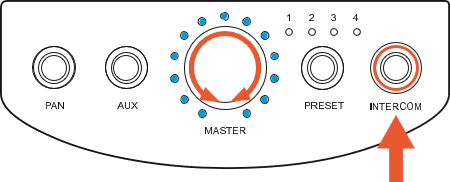
- Press and hold the "INTERCOM" button on the paired Mixer to test and adjust talk back volume with other users. Adjust the INTERCOM Volume (Master knob) to the desired level. The Virtual Mixer Card will retain the volume level of the last Mixer it was paired with or the latest level setting in PRO Connect.
Sending Talk Back From the Control Room
- With a mic connected to the console, connect an output on the console to the 1/8" Stereo LINE IN AUX on the Virtual Mixer Card. This is an unbalanced input: tip (left), ring (right), sleeve (ground).
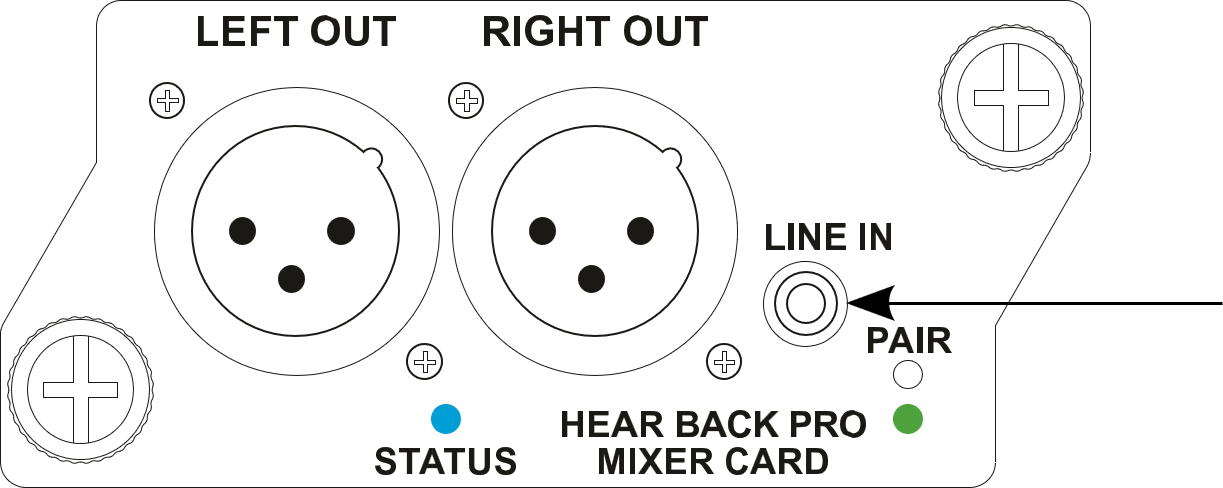
- The intercom and the connected mic will be triggered by clicking "INTERCOM" on the Virtual Mixer Card in PRO Connect. You can now adjust your intercom mic output volume.
Technical Specifications
Aux Input
Line Input Config/Impedance:
1/8" Stereo, unbalanced, 10K ohms typical
Line Input Level:
0 dBu optimal, +18 dBu max
Line Output
Max Output Level:
+24 dBu
Frequency Response:
20 Hz to 20 KHz, +/-0.2 dBu
THD+N:
0.004% typical at 1 KHz, +15 dBu
0.006% typical, 20 Hz – 20 KHz, +4 dBu
Inter Modulation Distortion:
0.004% typical at +4 dBu, 60 Hz/7 KHz
Propagation Delay:
Digital Input to Analog Input:
< 0.092 mSec @ 192 kHz sample rate
Analog Input to Analog Input
< 0.248 mSec @ 192 kHz sample rate